Skip to content

Budget-Friendly Podcasting: A Beginner's Guide to Affordable Podcast Creation

So, you want to start podcasting but aren’t sure where to begin? With just a bit of planning and a small budget, you can quickly dive into the world of podcasting. The key is to start as soon as possible, because the more you practice, the better you’ll become. Don’t worry if your first podcast isn’t perfect – it’s all part of the learning process. Remember, the most popular podcasts didn’t become number one overnight. Persistence and improvement come with time, and as you find your unique groove, your podcast will naturally evolve. The most important thing is to have fun; when you enjoy creating your podcast, your listeners will enjoy tuning in.

Build your own setup Vs All in one Podcasting Bundles

Build your own podcast setup – $100-$1000+. If your trying to get started with as little money as possible, and still get good quality components at the same time then building your own podcasting setup is the way to go. You can get by with just a mic and some headphones if your really strapped. If you have a couple of hundred buck to spend you can get a quality setup that will create great quality content.

Good quality All in one bundles$350-$1000+.  You can buy an all-in-one podcasting kit or bundle and get the whole high quality set up in one fell swoop, and this is a great way to go. Some of these bundles have the mics, cables, stands, recorders and more. So you can unpack, setup, and your off. I will include a few of my top picks of podcast bundles at the end of the article here.

For this article we’re going to focus on putting together an affordable quality podcast setup buy choosing separate pieces and putting it together. Even if you don’t end up doing it this way, hopefully this article will help you understand what pieces your gonna need to start a podcast.

Podcast 101: what equipment do you need to start a podcast?

  1. Microphone
  2. Computer
  3. Recording software
  4. Monitoring (headphones)


What Does A Podcast Setup Look Like?

First, let’s look at four possible podcast setups:

  1. The Best Budget Setup:  USB Microphone Directly into a Laptop:

    • Description: This is the simplest and most budget-friendly setup. It involves using a USB microphone that can be directly plugged into your laptop or computer.
    • Pros: Easy to use, minimal technical knowledge required, and generally more affordable. Ideal for beginners or solo podcasters.
    • Cons: Offers less control over sound quality compared to more advanced setups.
    • Example Use: Perfect for individual podcasters who are just starting out and primarily record solo episodes.
  2. The Intermediate Setup: Microphone with XLR Connection to an Audio Interface:

    • Description: In this setup, a higher-quality microphone using an XLR cable is connected to an audio interface, which then connects to your computer.
    • Pros: Provides better sound quality and more control over audio levels and quality. Good for interviews or podcasts with multiple hosts.
    • Cons: More expensive than a basic USB mic setup and requires some technical knowledge to manage the audio interface.
    • Example Use: Suitable for podcasters who are ready to upgrade their audio quality and possibly host guests or co-hosts.
  3. Pro Setup: Microphone into a Podcast-Specific Interface:

    • Description: This setup involves plugging one or more microphones into a podcast-specific interface or mixer, which then connects to a computer. These interfaces are designed specifically for podcast production.
    • Pros: Offers advanced control over sound, multiple inputs for several microphones, and often includes built-in effects and processing.
    • Cons: More expensive and requires a learning curve to fully utilize its features.
    • Example Use: Ideal for professional podcasters or those who regularly have multiple guests and need the flexibility and control offered by these devices
  4. Extra option: Portable Recorder as an All-in-One Solution:

    • Description: A portable recorder can be used as a standalone device to record podcasts. Some models allow for external mics to be connected, while others have built-in microphones.
    • Pros: Highly portable, easy to set up, and versatile for recording in various environments.
    • Cons: May not offer the same audio quality as a dedicated studio setup.
    • Example Use: Great for podcasters who need to record in different locations or prefer a simple, all-in-one device.

Choosing the Right Microphone

OK, First and foremost, quality audio must be captured. Regardless of your podcast’s topic, having high-quality audio is absolutely imperative. It’s not rocket science, but it does require serious consideration. Remember, today’s podcast audience is accustomed to high-quality sound. If your audio quality falls short, your podcast might sound amateurish, even if the content is excellent. With that in mind, there’s a wide range of microphones available, from budget-friendly options to high-end industry standards.

Here are some industry favorites for USB mics:

  • Blue Yeti USB Microphone

    • Description: The Blue Yeti is a favorite among podcasters for its excellent sound quality, ease of use, and versatility. It features multiple pattern settings (cardioid, bidirectional, omnidirectional, and stereo) which makes it suitable for different recording situations.
    • Price Range: Mid-range
  • 75$ Audio-Technica ATR2100x-USB Cardioid Dynamic Microphone

    • Description: This microphone is known for its clear sound and durable design. It offers both USB and XLR outputs, making it a versatile choice for podcasters who might want to upgrade their setup in the future.
    • Price Range: Mid-range
  • Samson Q2U Handheld Dynamic USB Microphone

    • Description: The Samson Q2U is a great budget-friendly option that also provides both USB and XLR connections. It’s known for its solid build and good sound quality, especially for its price.
    • Price Range: Budget-friendly
  • 30$ Fifine Metal Condenser Recording Microphone

    • Description: This is an affordable option for those just starting out. It offers decent sound quality for its price and a sturdy metal construction.
    • Price Range: Budget-friendly
  • 97$ Rode NT-USB Mini USB Condenser Microphone

    • Description: The Rode NT-USB Mini is praised for its compact design, ease of use, and excellent sound quality. It’s a bit more expensive than other entry-level options but offers great value.
    • Price Range: Mid-range
  • 46$ Maono USB Microphone Kit

    • Description: This kit is perfect for beginners as it comes with everything needed to start podcasting, including a microphone, boom arm, shock mount, and pop filter.
    • Price Range: Budget-friendly

Microphone setup basics:

Setting up a microphone for podcasting involves several key considerations to ensure high-quality audio recording. 


Plosives: First, it’s essential to use a pop filter, a simple mesh screen that sits between you and the microphone. It helps to reduce or eliminate ‘plosive’ sounds – the harsh sounds that occur when pronouncing letters like ‘P’ and ‘B’. These sounds can cause spikes in your audio recording, making it unpleasant for listeners.


If you don’t have a pop filter, another technique is not to talk directly into the mic, but slightly off to the side. This keeps the air from hitting the mic directly and can make the audio more consistent without using a pop filter.


Room echo: Podcasting in a room with soft furnishings, like carpets and curtains, can help absorb sound and reduce echo. If your room is echoey, consider investing in acoustic foam panels to improve sound quality. Additionally, be mindful of background noise. Record in a quiet environment and, if possible, use a dynamic microphone which is less sensitive to ambient noise compared to a condenser microphone.


Gain staging: This involves setting the right levels for your microphone to ensure your audio is clear and free from distortion. The goal is to record at levels that are loud enough to be above the noise floor (the ambient noise level of your recording space) but not so loud that it causes clipping (distortion that occurs when the signal is too strong for the microphone or recording device). Experiment with the gain settings on your microphone and audio interface (if using one) to find the right balance.

In summary, using a pop filter, managing room echo, minimizing background noise, and proper gain staging are key steps to setting up your microphone for podcasting, ensuring a professional and pleasant listening experience for your audience.

USB Interfaces

What is an interface?

An interface is a device, typicaly a little box or rack mount gear that connects microphones and instruments to a computer, converting analog signals of the microphone into digital audio. It’s crucial for achieving high-quality sound recordings, offering precise control over levels and inputs. With interfaces, podcasters can produce studio-grade audio, essential for professional-sounding podcasts.

Types of interfaces

interfaces range from simple USB audio interfaces, ideal for solo podcasters, to multi-channel interfaces for larger setups. USB interfaces offer ease of use and portability and are pretty cheap these days!

How do you mix with a box?

So all your mics plug into the interface, and in the computer you mix the levels or add effects within your software. So instead of having an actual mixing board, its all digital inside the computer. This is what people refer to as “In the box” mixing and recording. This is convenient, cheaper, and takes up less space than having a real mixer. For the beginner podcasting, its definitely  the way to go!

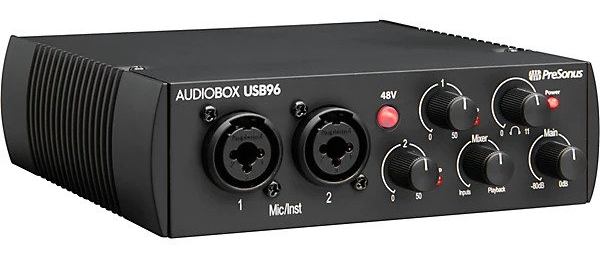
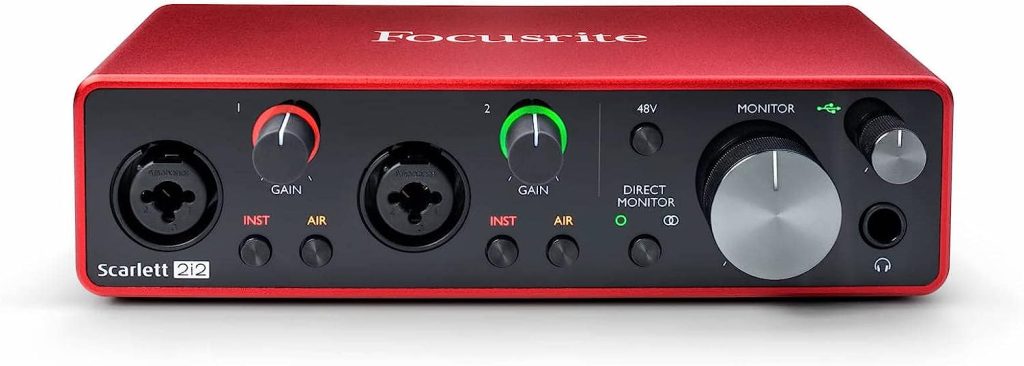
I have used this Presonus for years to play guitar through my laptop, and record voice overs. It’s cheap and the sound quality is pretty damn good. There are many USB interfaces on Amazon that are probably just as good, but i wouldn’t know.

Presonus USB interface

Mixer interfaces

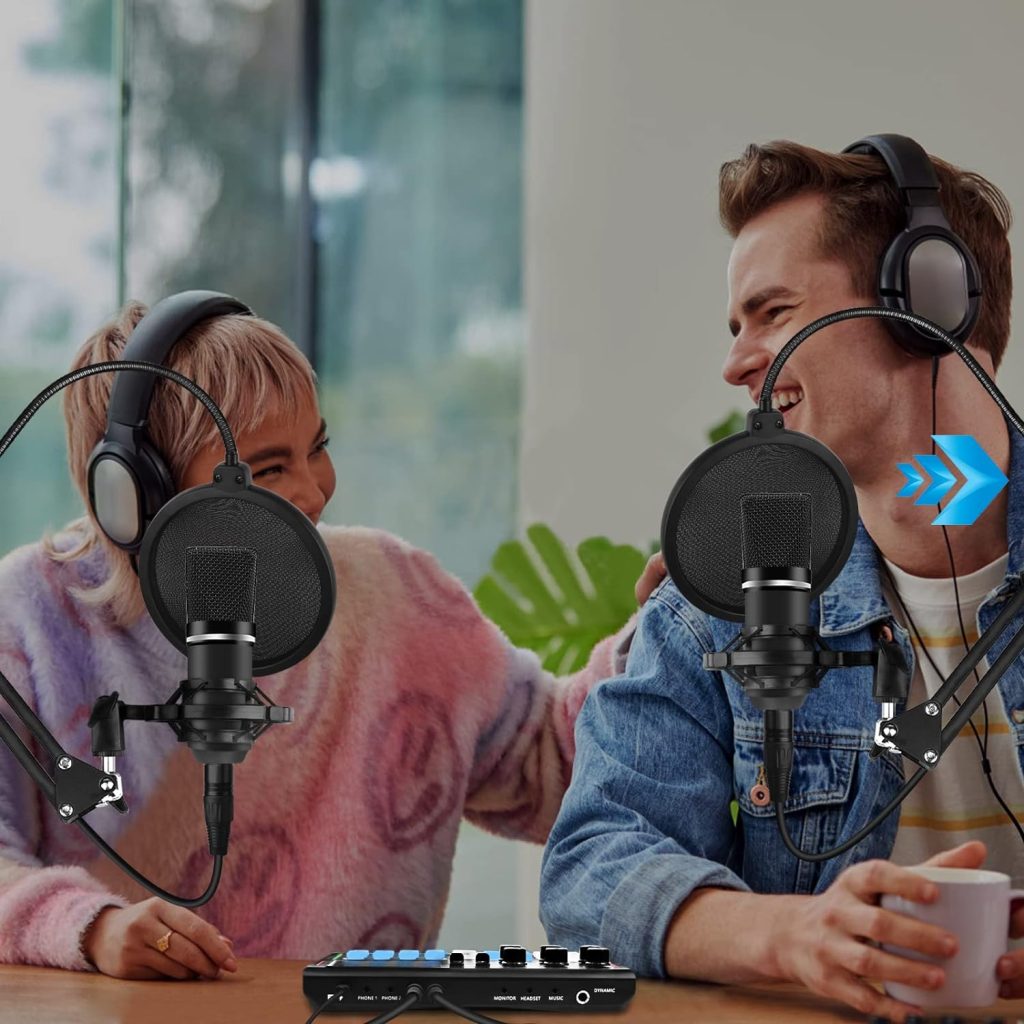
Mixer interfaces combine traditional mixing capabilities with digital connectivity, perfect for live podcasting and multi-person shows. The cheap ones tend to have mixed reviews, but they may be worth a try. So basically with these you can do some volume/effects adjusting with real physical knobs on the fly. These boxes do still hook to your computer and have their own software to manage. And this brings up a good point to consider: If you buy a cheapo no name brand interface your likely gonna get cheap ass janky software to go with it. Higher end brands come with better software usually. Just keep that in mind. Below is an example of  a mixer and interface combo. Te reviews seem pretty good, but I have no experience with that atricular unit.

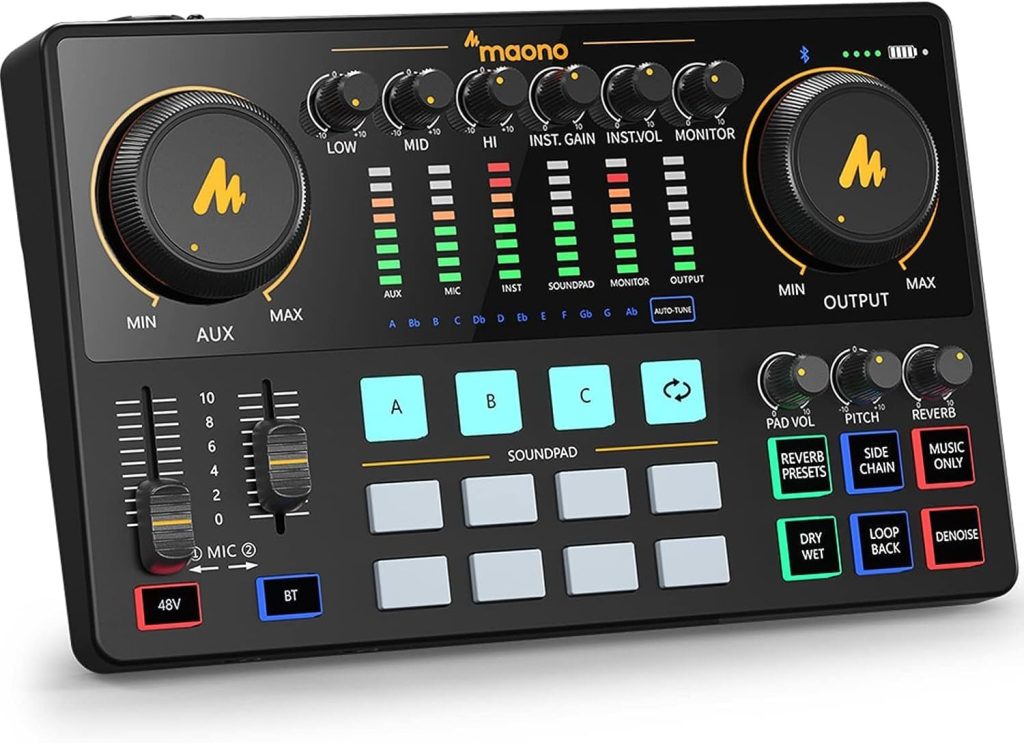
MAONO Audio Interface


A few good USB interfaces to check out:

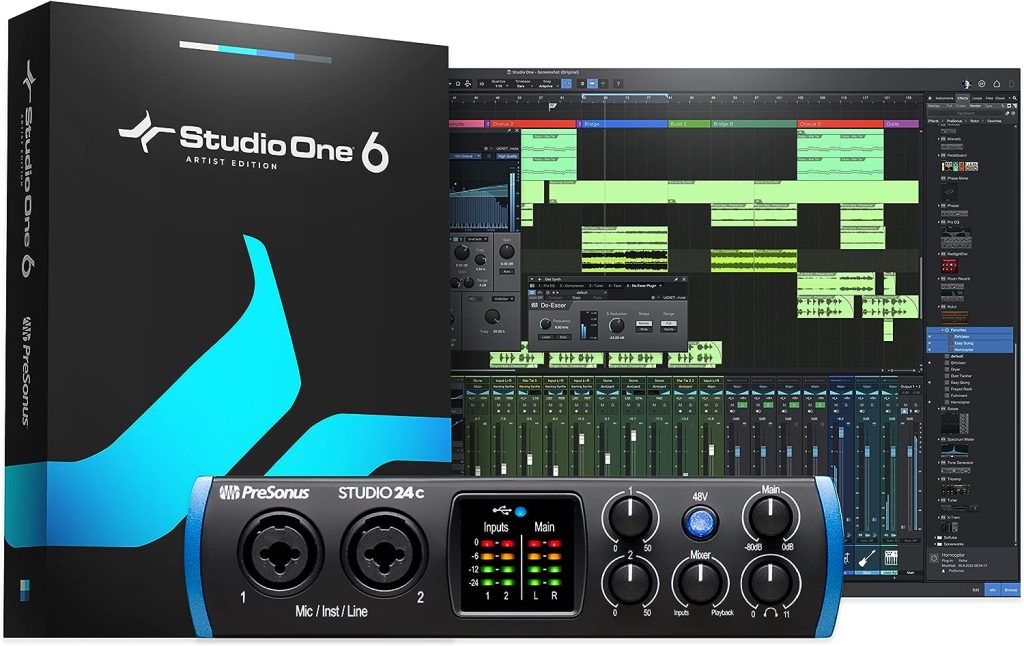
  1. PreSonus Studio 24c– omes with recording software! Offers additional features and enhanced audio quality, suitable for more serious podcasters.


  1. Focusrite Scarlett 2i2 – A popular mid-range choice, offering great quality and reliability.


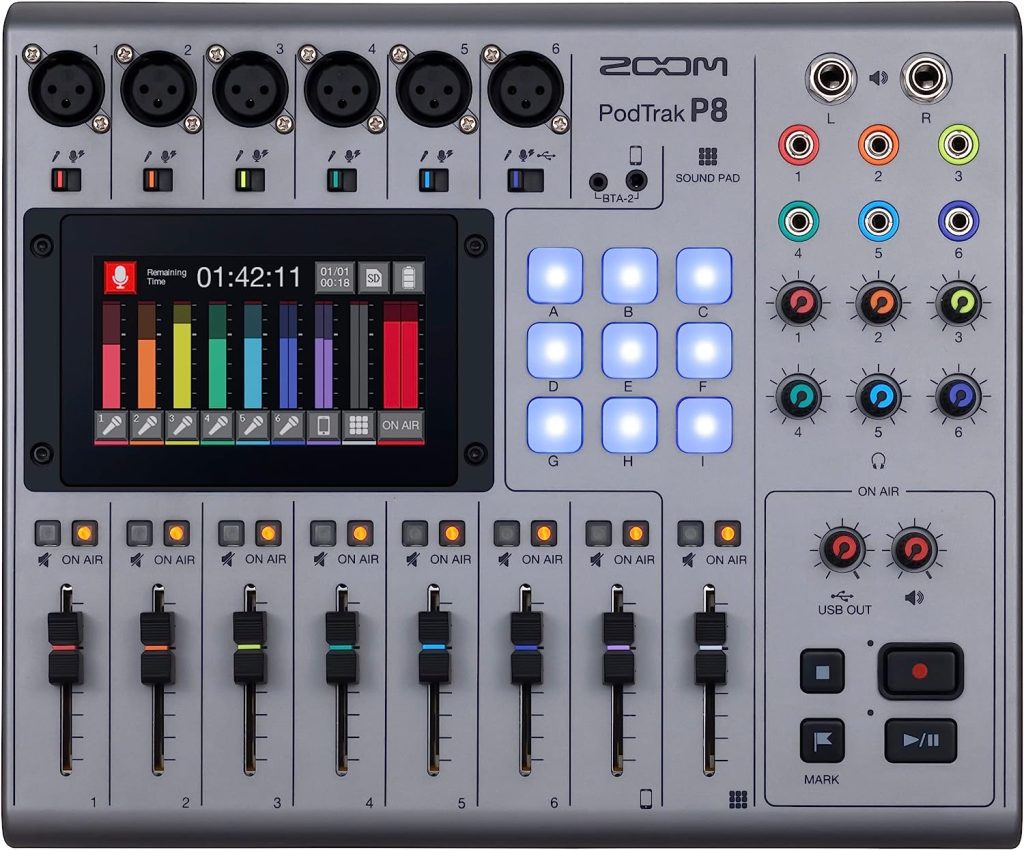
  1. Zoom PodTrak P8 Podcast Recorder – All in one solution! interface and recorder all in one.

(Cheap) Reliable Recording Software

Now that you’ve connected your quality microphone to your laptop or interface, adjust the levels using the digital mixer provided by the interface manufacturer. If you’re connecting directly to your laptop, use the built-in soundcard mixer interface. Next, you’ll need recording software for your podcast. What’s the best choice?


For beginner podcasters looking for budget-friendly recording software, there are several excellent options that blend ease of use with robust features. 

Audacity stands out as a top choice; it’s a free, open-source program compatible with multiple operating systems. It offers a range of essential tools, such as multi-track recording and editing, which are intuitive for newcomers yet powerful enough for more advanced tasks.


Another great option is GarageBand for Mac users, known for its user-friendly interface and a decent selection of built-in instruments and loops for those who want to add a musical flair to their podcasts. 


For those on Windows, Ocenaudio is another free, easy-to-use option that provides basic editing tools and supports a wide range of audio formats. These software options not only cater to the budget-conscious but also provide a strong foundation for mastering the art of podcast production.clad

Headphones for Accurate Monitoring

For monitoring audio while podcasting, headphones are essential. During the recording process, headphones are essential for monitoring audio levels and quality in real time. This immediate feedback allows for adjustments on the fly, ensuring the best possible recording quality.

The main reason you can’t use speakers is due to the risk of feedback loops. When a microphone is placed near a speaker that is broadcasting the same sound being captured by the microphone, it creates a feedback loop. This loop amplifies and re-amplifies the same sound, leading to a loud, often high-pitched, and unpleasant/painful noise known as feedback. Headphones prevent this issue by ensuring that the sound from the microphone does not re-enter the microphone through the speakers, maintaining a clear and feedback-free audio environment.


Best podcast headphones :

Treat Your Room for Better Acoustics

the whole idea about treating your room for better acoustics is to minimize echo and reflections of sound. Professional studios spend a lot of money and there’s a lot of serious math involved to get an excellent listening and recording environment. But for a bedroom podcaster there’s some basic things you can do on the cheap to reduce echo in your room which will make the audio sound much better.

  1. First, don’t podcast in an empty room it’s going to be an echo nightmare.
  2. You want soft surfaces that absorb the sound, on the walls and floors. On the cheap,  you can get thick curtains on the walls, and rugs on the floors if you have hard floors. Go to a local thrift store or carpet company and ask for remnants.
  3. If you wanna make things look legit and impress your guests, you should buy acoustic foam and install that on the walls with an adhesive. That’s the best idea because it looks good and is actually better at absorbing sound than putting curtains up or trying to hang rugs. Also, once it’s up, it will give you that real studio vibe which is cool in itself.

Check out this whole page of budget acoustic foam panels on Amazon: https://amzn.to/3R5ArOO


Podcast Bundles


  1. Rode RODECaster Pro II – It’s the most expensive of the bunch here, but is good quality components and it’s enough to get you started with up to four guests. I have used Rode and Zoom products for many years. Check it out here

  2. Cheapo option – you’ll see a lot of these strange unknown brands on Amazon I can’t vouch for them but look at the reviews here’s a few to check out.

    MAONO Podcast Equipment Bundle

    Hayner-Seek Podcast Equipment Bundle for 2